
Homemade Sourdough Bagel Recipe: Easy Step-by-Step Guide
Table of Contents
sourdough bagel recipe : Every weekend, my kitchen turns into a bakery. The smell of fresh bread fills the air. It promises a tasty adventure that beats store-bought bread.
Creating sourdough bagels is more than cooking. It’s a passion that connects you to baking traditions. This guide will show you how to make perfect homemade bagels recipe. You’ll learn secrets that make simple ingredients into amazing breakfast treats.
Whether you’re an experienced baker or just starting, this recipe will help you make amazing bread at home. Get ready to improve your baking and wow your family with delicious, chewy bagels. Each bite tells a story.
Key Takeaways
- Master the art of sourdough bagel baking at home
- Learn professional techniques for perfect texture and flavor
- Understand the importance of fermentation in sourdough
- Discover how to create authentic, restaurant-quality bagels
- Transform basic ingredients into extraordinary bread
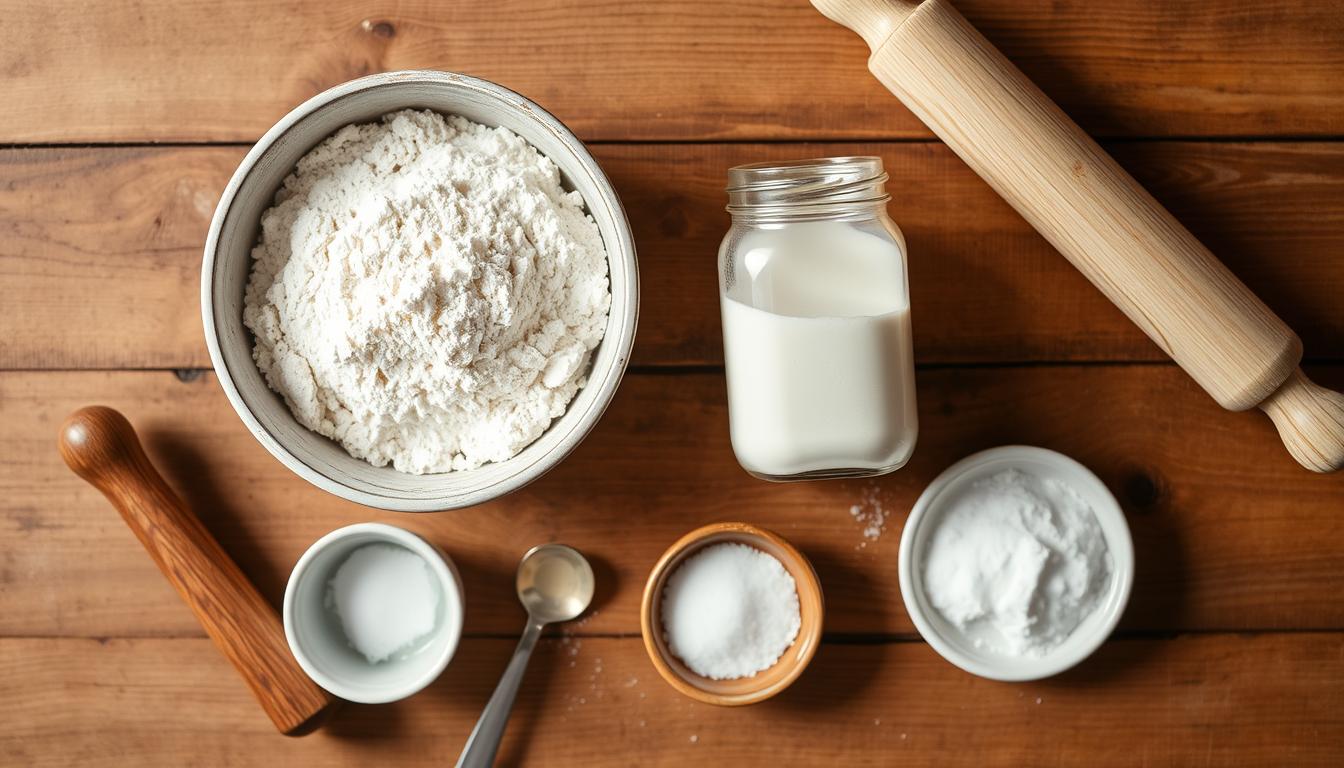
Essential Tools and Ingredients for Perfect Sourdough Bagels
Making delicious homemade sourdough bagels needs the right tools and ingredients. Start your journey to making authentic bagels by knowing the key tools and ingredients. They will turn your sourdough starter into tasty bread.
Kitchen Equipment Essentials
Starting with the right tools is key to making great bagels. Here’s what you’ll need:
- Large mixing bowl
- Digital kitchen scale
- Baking sheet
- Parchment paper
- Large pot for boiling
- Slotted spoon
Quality Ingredients for Authentic Flavor
High-quality ingredients are crucial for your sourdough starter and dough. Choose unbleached bread flour, sea salt, and filtered water for the best taste.
Consider adding these to enhance your bagels:
- Organic bread flour
- Non-iodized sea salt
- Malt syrup for traditional flavor
Understanding Your Sourdough Starter
Your sourdough starter is the heart of your bagel recipe. It should be active, bubbly, and recently fed before starting.
“A healthy sourdough starter is like a living ecosystem – it requires consistent care and attention.” – Artisan Baker
A good sourdough starter has these traits:
- Consistent rising and falling pattern
- Pleasant, slightly tangy aroma
- Visible bubbles throughout
- Ability to double in size within 4-8 hours after feeding
By using quality tools and understanding your sourdough starter, you’ll make amazing homemade bagels. They’ll be as good as those from a professional bakery.
Preparing Your Active Sourdough Starter
Creating a vibrant sourdough starter is key to making great artisan bagels. Your starter is alive with wild yeasts and bacteria. It adds depth and character to your baking. Keeping your starter healthy takes patience, regular feeding, and knowing its rhythms.
To make a strong sourdough starter for your bagels, follow these steps:
- Use high-quality organic flour (preferably whole wheat or rye)
- Maintain a consistent feeding schedule
- Keep starter at room temperature between 70-75°F
- Discard portion of starter before each feeding
Signs of a healthy sourdough starter include:
| Characteristic | Indication |
|---|---|
| Bubbling Activity | Consistent bubble formation throughout mixture |
| Aroma | Pleasant, slightly tangy smell |
| Volume | Doubles in size within 4-8 hours after feeding |
“A well-maintained sourdough starter is the secret weapon of every artisan baker.” – Professional Baker’s Handbook
Timing is key when getting your sourdough starter ready for bagels. Use it when it’s most active, usually 4-6 hours after feeding. This gives your bagels the best leavening and flavor.
Pro tip: Always keep a small portion of starter as a backup in case of unexpected issues.
Mastering the Sourdough Bagel
Making authentic new york-style bagels needs precision and care. The secret to a perfect bagel is knowing the basic techniques. These techniques turn simple ingredients into a tasty treat.
Mixing and Kneading Techniques
Your bagel dough needs careful mixing. Start by adding ingredients slowly to build the right gluten structure. Here are some mixing tips:
- Mix ingredients until they form a cohesive mass
- Knead for 10-12 minutes by hand or 8 minutes in a stand mixer
- Achieve a smooth, elastic texture that springs back when touched
Proper Dough Temperature Control
Temperature is key in making your new york-style bagels. Keep the dough temperature between 75-80°F for best fermentation.
“Perfect bagel dough is about feeling the temperature and understanding its rhythm.” – Professional Baker
First Fermentation Tips
The first fermentation is when your bagel dough gets its complex flavors and structure. Look for these signs of good fermentation:
- Dough should increase in volume by 50-75%
- Surface becomes slightly domed and puffy
- Bubbles form throughout the dough
Pro tip: Use a clear container to track your dough’s fermentation progress easily.
Shaping and Forming Your Bagels
Bagel shaping is an art that turns your sourdough into the classic ring-shaped bread we all love. It takes practice and understanding of key techniques to master homemade bagels.
Your bagel shaping journey starts with dividing the fermented dough into equal parts. Professional bakers suggest using a kitchen scale for accuracy. Each part should weigh about 120-150 grams for standard-sized bagels.
- Divide dough evenly using a bench scraper
- Pre-shape each portion into a smooth ball
- Rest balls for 10-15 minutes to relax gluten
There are two main ways to shape the bagels:
- Rope Method: Roll each dough ball into a 10-inch rope, then connect the ends to form a circle
- Thumb Punch Method: Press your thumb through the center of a dough ball, then stretch to create a wide hole
“The perfect bagel shape is about technique, not perfection.” – Professional Baker
| Shaping Technique | Difficulty Level | Time Required |
|---|---|---|
| Rope Method | Intermediate | 5-7 minutes |
| Thumb Punch Method | Beginner | 3-5 minutes |
When shaping your homemade bagels, aim for a smooth surface and a tight seal. Pinch the ends together firmly to prevent unraveling during boiling and baking. Practice will help you develop muscle memory and consistent results.
The Art of Bagel Proofing
Proofing is key in bagel baking. It turns raw dough into a tasty, perfect bagel. Learning about proofing can make your bagels as good as those from a bakery.
Overnight Cold Fermentation Magic
Cold fermentation changes bagel baking. Letting dough chill in the fridge overnight boosts flavors and texture. It’s a slow process that makes the bagels taste complex.
- Refrigerate dough at 38-40°F
- Allow 12-16 hours of cold fermentation
- Cover dough tightly to prevent drying
Visual Cues for Perfect Proofing
Spotting the right proofing time needs your eye. Look for these signs:
| Proofing Stage | Visual Indicators |
|---|---|
| Underproofed | Dense, tight appearance |
| Perfectly Proofed | Slight jiggle, increased volume, puffy surface |
| Overproofed | Flat, deflated look with excessive bubbles |
Temperature and Humidity Control
Getting the right proofing spot is important. Keep the temperature steady and humidity moderate. A proofing box or a warm, still spot in your kitchen is best.
“Patience in proofing is the secret ingredient to extraordinary bagels.” – Artisan Baker’s Wisdom
Getting good at proofing takes time. But with these tips, you’ll soon make bagels as good as those from a bakery. Every batch is a chance to learn more about making perfect bagels.
The Essential Boiling Process
Bagel boiling is key to making real, chewy bagels. It gives them a glossy look and a dense texture. This makes bagels different from other breads.

The boiling process is easy once you get it. You need a big pot of water and some special ingredients. These help make the perfect bath for your bagels.
- Use a wide, deep pot for easy bagel dunking
- Maintain water temperature between 200-212°F
- Boil bagels for 30-60 seconds per side
Professional bakers add special ingredients to the water. This boosts flavor and looks. Here’s a quick guide to these additives:
| Additive | Purpose | Effect on Bagels |
|---|---|---|
| Baking Soda | Increases alkalinity | Darker, shinier crust |
| Malt Syrup | Adds sweetness | Golden brown color |
| Honey | Natural sweetener | Slightly caramelized exterior |
“Boiling is what makes a bagel a bagel – it’s not just bread, it’s an art form.” – Artisan Baker
When boiling your sourdough bagels, use a slotted spoon. Gently lower them into the water. Flip them halfway for even cooking. This ensures they turn out chewy.
After boiling, your bagels are ready for toppings and baking. They’ll have a professional shine and a perfect crumb.
Topping Options and Techniques
Creating delicious artisan bagels is more than just the dough. The toppings are key to making your sourdough bagel special. The right toppings can turn a simple bread into a gourmet delight.
Classic Bagel Toppings to Elevate Your Sourdough
Your sourdough bagels need toppings that match their rich taste. Here are some top picks:
- Sesame seeds – traditional and nutty
- Everything bagel seasoning – a flavor explosion
- Poppy seeds – classic and sophisticated
- Dried onion flakes – adds savory depth
- Coarse sea salt – enhances natural flavors
Mastering Topping Application Techniques
To get your toppings to stick perfectly, follow these tips:
- Apply egg wash before sprinkling toppings
- Gently press toppings into the surface
- Use a shallow dish for even coating
- Rotate bagel for complete coverage
| Topping Category | Flavor Profile | Best Pairing |
|---|---|---|
| Seed Toppings | Nutty and Crunchy | Plain or Whole Wheat Sourdough |
| Herb Toppings | Fresh and Aromatic | Garlic or Rosemary Sourdough |
| Sweet Toppings | Sugary and Indulgent | Cinnamon Raisin Sourdough |
Pro tip: Try unique bagel toppings to make your own signature artisan bagels. They’ll be different from what you find in bakeries.
Baking Your Sourdough Bagels to Perfection

To bake bagels perfectly, you need to be precise and careful. Your home oven is key to making crusty bagels with a golden-brown look. Preheat your oven to 450°F (232°C) at least 30 minutes before baking. This ensures the heat is evenly distributed.
“The secret to great baking bagels is understanding your oven’s unique characteristics.” – Professional Baker
Get your baking surface ready for the best results. A baking stone or steel is great for retaining heat and making the crust crispy. Put the stone on the middle rack of your oven while it’s preheating.
- Use a baking stone for even heat distribution
- Preheat oven to 450°F
- Position rack in the middle of the oven
- Create steam for crusty exterior
Steam is key for a beautiful crust on your sourdough bagels. To create steam, place a metal pan with water on the bottom rack. Or spray water into the oven right after putting the bagels in. This method gives your bagels that bakery-style crust.
| Baking Stage | Temperature | Duration |
|---|---|---|
| Initial Bake | 450°F | 15-18 minutes |
| Final Browning | 425°F | 3-5 minutes |
Look for visual signs that your bagels are done. They should be deep golden-brown and have a crisp exterior. Let them cool on a wire rack for at least 20 minutes. This helps them develop their texture fully.
Conclusion
Making homemade bagels is more than a baking project. It’s a journey that connects you with old bread-making ways. Your sourdough bagel recipe is a mix of skill, patience, and art. It turns simple ingredients into amazing breakfast treats.
As you make your homemade bagels, you’ll learn something new each time. The fun of sourdough bagel making is that you can try different things. You can mix different flours, add unique toppings, and play with flavors while keeping the main techniques.
Getting good at this takes time. Your first tries might not be perfect, but each one teaches you something. Enjoy the learning, share your baking with others, and enjoy the tasty results of your sourdough bagel journey.
Your kitchen is ready to make real, top-notch bagels that will wow everyone. Start baking, stay curious, and let your sourdough passion lead you to amazing dishes.
Did You Try This Recipes
There are no reviews yet. Be the first one to write one.